,

Easy Guide: How to Install Drywall Anchors Correctly

plastic anchors

Ever found yourself in the middle of a DIY project, excited to hang that new piece of art or shelf, only to hear the dreaded sound of your hard work crashing down? That’s where drywall anchors come to the rescue. These nifty gadgets are your best bet for a secure hold in the often flimsy drywall.

Whether you’re working with self-drilling anchors or the more complex snap toggles, the right approach will have you hanging fixtures like a pro in no time. Let’s get into the nuts and bolts of installing drywall anchors effectively.

What are Drywall Anchors?

Drywall anchors provide a secure grip for screws and bolts in the relatively soft and brittle material of drywall. They make it possible to hang heavy objects without the fear of them falling due to insufficient support.

Types of Drywall Anchors

Several types of anchors exist, each designed for specific load capacities and applications:

  • Expansion anchors: Ideal for light to medium loads, they expand against the drywall as a screw is tightened into them.
  • Threaded drywall anchors: These self-drilling anchors require no pre-drilling and are suited for holding medium loads.
  • Hollow-wall anchors: These need pre-drilled holes and are great for medium to heavy loads, featuring a metal body that expands behind the drywall.
  • Toggle bolt anchors: Best for the heaviest loads, a metal wing unfolds behind the wall, spreading the weight across a larger area.

When to Use Drywall Anchors

You’ll need to use drywall anchors in situations where:

  • The object you’re hanging is too heavy for a simple nail to support.
  • There’s no stud located where you wish to hang the item.
  • Secure and long-lasting installation is required for items that are used or moved frequently, like towel racks or curtain rods.

Remember, using the right type of anchor is crucial for the safety and longevity of your wall hangings.

Tools and Materials Needed

List of Tools

When you’re ready to install drywall anchors, you’ll need a specific set of tools to perform the job correctly and safely. Ensure you have the following items at hand:

  • Hammer: Essential for tapping anchors into place gently without damaging the surrounding wall.
  • Screwdriver: A must-have for twisting screws into the anchors to secure the object you’re hanging.
  • Power Drill: For creating pilot holes of appropriate sizes, a power drill is highly efficient and saves time.
  • Drill Bit Set: You’ll need various sizes to match the drywall anchors you’ve chosen, ensuring a snug and proper fit.
  • Stud Finder: This tool helps you to avoid drilling into a stud, which is unnecessary when using anchors and could lead to over-constraining the wall material.

Remember, the right tools will not only make the job smoother but will also prevent mishaps such as cracked drywall or insufficiently secured items.

List of Materials

The materials required for installing drywall anchors involve different types of anchors and fasteners, each tailored to the weight and size of the objects you’re hanging:

  • Expansion Anchors: Ideal for lightweight items, utilizing the spreading mechanism to grip the drywall.
  • Threaded Drywall Anchors: More robust than expansion types, these are suited for medium loads and can be driven in without pre-drilling.
  • Hollow-Wall Anchors: Great for heavier objects, they expand behind the wall providing increased stability.
  • Toggle Bolt Anchors: Best for the heaviest items; metal toggle bolts are resilient, while their plastic counterparts are for lighter loads.
  • Screws: Necessary to secure into the anchors and vary in length and thickness depending on the anchor type and the object’s weight.

By choosing the correct anchor for your object’s weight and the appropriate screws, you’ll ensure a strong hold that lasts, keeping your walls and hung objects intact and secure.

man drilling the wall with drill perforator

Steps to Install Drywall Anchors

Step 1: Mark the Spot

Finding the precise location for your drywall anchor is crucial. Use a pencil to mark the wall where you plan to hang the item. For precision, a level helps ensure that your marks are perfectly aligned, especially when installing multiple anchors.

Step 2: Choose the Right Anchor

Selecting the proper anchor depends on the weight of the object and the wall type. Threaded drywall anchors work best for lighter items, while toggle bolt anchors are ideal for heavier loads. Always check the anchor’s weight capacity mentioned on its packaging.

Step 3: Preparing the Anchor

Examine the anchor and ensure all components are present. For snap toggle anchors, ensure that the wings can move freely, and for self-drilling anchors, that the threads are intact.

Step 4: Drill the Pilot Hole

If your chosen anchor requires a pilot hole, drill one using the correct size drill bit. The hole should be slightly smaller than the anchor to ensure a snug fit. The anchor’s packaging typically indicates the necessary drill bit size.

Step 5: Insert the Anchor

For anchors that require tapping in, use a hammer to lightly drive them into the wall at the marked spots. For self-drilling types, apply gentle pressure and screw them in until flush with the drywall. Avoid using excessive force to prevent damage to the wall.

Step 6: Secure the Anchor

Once the anchor is in place, use a screwdriver to insert the screw. Turn it clockwise until it’s secure but not overtightened – this might cause the anchor to fail. If you’re using a drill, set it to a low torque setting and proceed with caution.

Step 7: Test the Anchor

Gently pull on the anchor to test its hold. If it doesn’t move or loosen, it’s ready to support your object. Attach your fixture or hang your item and apply gradual weight to ensure the anchor maintains its grip.

Remember, each type of anchor has its specific instructions for best use, so it’s vital to follow the manufacturer’s guidelines for optimal performance.

Consider the Weight of the Object

The integrity of your installation depends largely on matching the anchor to the weight of the object you’re hanging. Heavy items require sturdier anchors such as toggle bolts or molly bolts, which can handle a greater load. Below is a quick reference guide for weight capacities of common anchor types:

Anchor Type Weight Capacity
Plastic expansion anchors Up to 8 kg
Self-drilling anchors Up to 22 kg
Molly bolts Up to 22 kg
Toggle bolts Up to 45 kg

Always verify the manufacturer’s weight ratings. Exceeding the recommended weight limit can lead to anchor failure.

Conclusion

You’re now equipped with the knowledge to install drywall anchors confidently. Remember, the key to a secure and lasting hold is in the details—select the right anchor, mark your spot with precision, and avoid overtightening. Your diligence in these steps will pay off when your wall hangings stay firmly in place. With these tips in hand, you’ll tackle any drywall project like a pro. Go ahead and hang that shelf or artwork, knowing you’ve done the job right.

,

Hang Drywall Flawlessly: Corner Beads & Smooth Finishing

interior construction housing project door installed construction materials

Mastering the art of hanging drywall is a game-changer in any home renovation project. It’s the invisible foundation that sets the stage for a flawless finish. Whether you’re tackling a new build or refreshing an old room, getting the drywall right is crucial. In this guide, you’ll learn the essential steps to properly hang drywall, ensuring your walls are sturdy and seamless before moving on to the finishing touches.

You’ll discover how to choose the right type of drywall for your specific project and the techniques to securely fasten it to wall framing and ceiling joists. Plus, we’ll share insider tips on preparing for the taping and finishing process, so you can achieve that perfect, paint-ready surface. Let’s dive in and transform those bare frames into smooth, solid walls.

Tools and Materials

Essential Tools

When taking on the task of hanging drywall, a set of essential tools will make your project efficient and ensure a professional finish. Drywall lift, while optional for smaller tasks, becomes a necessity for ceilings or high walls. You’ll find that it not only makes the job more manageable but also reduces the risk of the drywall breaking from mishandling.

Coarse-thread drywall screws are vital for fastening drywall sheets to wood framing whereas fine-thread screws are for metal studs. Using an electric drill is common, but for the best results, a drywall screw gun is preferred as it’s designed specifically to set screws at the perfect depth without damaging the drywall.

Tool Purpose
Drywall Screw Gun For fast, accurate screw placement into drywall
Coarse-thread Screws To fasten sheets to wood framing (1 5/8″ for walls, 2″ for ceiling)
Fine-thread Screws To fasten sheets to metal studs
Drywall T-square For straight, accurate cuts
Utility Knife For scoring and cutting drywall sheets
Drywall Saw For making cutouts in drywall sheets
Measuring Tape To measure and mark drywall for cutting
Chalk Line To snap long, straight lines for cutting
Drywall Screw Setter Bit To countersink screw heads

Optional Tools

In addition to the essentials, some optional tools can upgrade your drywall hanging experience. A laser level can expedite the installation process, especially on larger projects, by ensuring precise alignment without constant measuring.

Hole saw bits are particularly useful when you need to create neat, circular cutouts for electrical outlets or piping — a task that’s more challenging with just a drywall saw.

A drywall square aids in achieving those perfect, straight cuts, going further than a regular metal yardstick.

Tool Purpose
Laser Level For precise alignment and leveling
Hole Saw Bits For creating clean circular cutouts

Materials

In the world of drywall, the right materials are just as crucial as the tools used. You’ll most likely be using 4 x 8 UltraLight Sheetrock, a popular choice for its manageable weight and durability.

Drywall tape, with paper tape being the most preferred, is essential for reinforcing the joints between sheets, giving you that smooth, uninterrupted surface post-finishing.

Drywall setting compounds, often referred to as ‘mud’, are used in conjunction with the tape to fill in screw holes, seams, and any imperfections, forging a seamless canvas for painting or wallpapering. And lastly, a topcoat of drywall mud for that final touch, rejuvenating your walls into a pristine state ready for decoration.

house interior remodeling

Material Use
UltraLight Sheetrock Base material for walls and ceilings
Drywall Tape For joint reinforcement
Drywall Mud To fill and smooth over seams, holes, and imperfections
Topcoat Final layer for a polished finish

With this comprehensive toolkit and material set, you’re well-equipped to create walls that are not only structurally sound but also aesthetically flawless.

Preparing the Workspace

When hanging drywall, setting up your workspace correctly is as critical as the installation itself. You’ll need a clear, accessible area and precise measurements to ensure a job well done. Let’s delve into the key preparatory steps.

Measuring and Marking

Accuracy is paramount when it comes to drywall installation. Before you even think about lifting a panel into place, you’ve got to get your measurements spot on. Here’s what you need to know:

  • Calculate Drywall Quantity: Take the total square footage of your walls and ceilings and divide by 32, the area of a 4×8-foot sheet. Always purchase an extra sheet or two per room to account for any mistakes or mishaps.
  • Precise Diagrams: Sit down with your tape measure and a notepad. Sketch out the dimensions of each wall and ceiling where drywall will be applied. Detail out each measurement, corner to corner, and ensure consistency by measuring widths at various points along the length.
  • Marking for Cutouts: Carefully transfer measurements to your drywall sheets, marking out where cuts need to be made for electrical boxes and fixtures.

Clearing the Area

A clutter-free space enhances safety and efficiency. Before unwrapping the first sheet of drywall:

  • Shift Furniture: Remove all furniture or obstructions from the room, leaving yourself ample space to maneuver the large sheets.
  • Protective Measures: Shield your flooring with drop cloths or ram board to prevent damage from tools, drywall sheets, and debris.
  • Electrical Safety: Ensure all electrical cables are not exposed to where screws or nails will be driven. Use nail plates to protect wires or plumbing close to the edge of the studs.

Preparing the Walls

The walls themselves need to be as ready as you are:

  • Stud Inspection: Verify that each stud is securely in place and that none are bowed or misaligned, as this could disrupt the smooth finish of your drywall.
  • Metal Shields Installation: When wires or pipes are closer than 3/4 inches to a stud edge, attach a nail plate to shield them from accidental punctures.
  • Clean Surfaces: Sweep the walls to remove dust or debris that could interfere with the adhesion of drywall tape or mud.

Remember, a well-organized, meticulous approach to preparing your workspace paves the way for a smoother installation process. Embrace each step of the preparation to ensure the most flawless finish for your drywall installation.

Installing the Drywall

Proper installation is key to ensuring that the drywall looks smooth and finished. In the sections below, you’ll find out how to cut, hang, and secure drywall effectively, as well as how to manage corners and edges for a professional look.

Cutting the Drywall

Cutting drywall accurately is essential for a snug fit between panels. Here’s the process:

  • Score the front side of the drywall using a sharp utility knife and a straightedge, cutting just through the paper.
  • Snap the panel along the scored line. For a complete separation, run the knife along the backside paper.
  • Use a drywall saw for irregular cuts, applying quick, short strokes.
  • Make pre-cuts for electrical outlets or switches before mounting the drywall sheet to the wall.

Accuracy is paramount; double-check your measurements to avoid wasted materials.

Hanging the First Sheet

Begin by hanging the first sheet horizontally and follow these steps:

  • Secure the panel with a screw at the center, ensuring it hits a stud.
  • Measure 16 inches to the left and right, marking each stud’s position.
  • Follow the marks with screws to attach the drywall firmly in place.

The initial sheet serves as a guide for the rest, so it’s vital to align it correctly.

Securing the Drywall

Use screws rather than nails to secure the drywall because screws provide better holding power. To secure the sheets:

  • Space screws about 16 inches apart along the studs.
  • Drive screws until the head is slightly dimpled without breaking the surface paper.
  • Avoid overtightening which can compromise the drywall integrity.

Ensure each panel is fastened properly, minimizing the risk of future issues such as nail pops.

Dealing with Corners and Edges

Corners and edges can be tricky, but with the right approach, they’ll look seamless:

  • For inside corners, use a drywall knife to push the tape into the corner.
  • Outside corners require metal or plastic corner beads for protection and a crisp edge.
  • Apply joint compound smoothly, sanding between coats for a polished appearance.

Managing these areas attentively is critical for a professional-grade finish.

Hanging the Remaining Sheets

Continue hanging the rest of your drywall with the same meticulous method:

  • Align and secure each sheet horizontally, following the stud marks.
  • Maintain a gap of about ¼ inch at the bottom to avoid buckling from floor expansion.
  • Stagger vertical seams to add strength to the installation.

Remember, uniformity and precision during this step ensure a smooth taping and mudding process later on.

By following these guidelines, you’ll have a well-installed drywall ready for the final finishing touches.

Taping and Mudding

Applying the Tape

Once you’ve installed your drywall, it’s time to begin the taping and mudding process. Taping is crucial for concealing joints between drywall sheets and preventing cracks in the finished walls. Start by applying a thin layer of drywall mud along the seams. Precut your drywall tape to the required length before you begin – this makes the application smoother and decreases the chance of mistakes.

Here’s how you’ll apply it:

  • Lay the tape over the seam, pressing it firmly into the mud.
  • Use a drywall knife to smooth out the tape, ensuring it adheres properly without any bubbles or creases.
  • Carefully wipe away any excess mud.

Remember, paper tape is often preferred over other types for its strength and ease of use.

Applying the First Coat of Mud

The first coat of mud is also known as the bedding coat. Apply a liberal amount making sure that it’s slightly thinner than normal; this ensures a good bond with the tape. Don’t strive for perfection with the first coat; focus on good coverage.

Key points for the first coat:

  • Cover the seam completely with mud.
  • Apply the tape and flatten it using a 6- or 8-inch drywall putty knife.
  • Smooth out any excess mud to leave a flat surface.

Be patient – don’t rush this step. Let the first coat dry completely before moving onto the next phase.

Sanding and Applying Subsequent Coats

Once the first coat has dried thoroughly, you’re ready for sanding. Using medium grit sandpaper, sand the dried mud smoothly, being careful not to scuff the paper surface of the drywall.

After sanding, apply additional coats:

  • Use fine grit sandpaper for finishing touches.
  • Allow each coat to dry fully before applying the next.
  • Patience is key, numerous thin coats will yield better results than a few thick ones.

It’s advised to use pink mud that changes to white upon drying, indicating readiness for the next layer. Remember to never apply mud over wet tape – always wait at least 24 hours between coats, barring the use of fast-drying ‘hot mud’.

By religiously following these steps, you ensure a smooth, professional-quality wall surface, ready for priming and painting.

Finishing Touches in Drywall Installation

Once you’ve secured your drywall panels, the next stages will focus on refining your work to achieve a seamless and professional quality finish. Pay close attention to the details here – the success of your drywall installation lies in the precision of the finishing touches.

Installing Corner Beads

Corner beads are critical for achieving crisp, clean lines at the edges of your walls. They reinforce the drywall, making corners more durable and less prone to cracking or damage.

Patching Any Imperfections

Despite your best efforts, imperfections can appear during the drywall installation process. This might include indentations, small holes, or rough patches. Screening the mud smoothly across joints and dimples is essential for a flawless finish.

Sanding and Smoothing

The final step in the drywall process is sanding. This step will make all the difference between a job that looks good enough and one that looks truly professional.

home renovation of an old room

Installing drywall is a task not to be taken lightly requiring plenty of tools, materials, and skill. The experts at Honest Renovations are true professionals with experience in drywall and other renovations who would be happy to help you with your project.

,

Kitchen Renovation Guide: 10 Essential Tips

Kitchen Renovation

Embracing the Journey of Kitchen Remodeling

Embarking on a kitchen remodel is a thrilling adventure that promises the creation of a beautiful new kitchen. It’s a significant commitment that requires meticulous planning and a clear vision. As you prepare for your kitchen renovation, it’s easy to get overwhelmed with the details, but don’t be afraid. This guide will walk you through the essentials, ensuring you’re well-equipped for the transformation ahead.

When you decide to renovate, you’re not just updating old cabinets or installing a new countertop; you’re setting the stage for new experiences and memories. It’s about more than just the aesthetics; it’s about creating a kitchen space that reflects your lifestyle and personality. Whether you’re a seasoned chef or a busy parent, your kitchen needs to be a place where functionality meets comfort.

Embracing the Journey of Kitchen Remodeling

What Should Homeowners First Consider When Planning a Kitchen Remodel?

Before you start a kitchen remodel, it’s crucial to understand the full extent of the project. What does your dream kitchen look like? Do you envision a modern galley kitchen or a spacious area with a kitchen island? Knowing before starting a kitchen remodel what you want to achieve helps set a clear path forward. The layout of your kitchen is the foundation of a functional space. It dictates the placement of every element, from the kitchen sink to the appliances.

You’ll also want to think about the common kitchen workflows and how you use your kitchen. Do you entertain often, requiring more space for guests, or do you need a more efficient setup for quick family meals? These considerations will influence everything from the width of the walkways to the type of appliances you choose. Don’t forget to factor in the practical aspects as well, such as the location of plumbing and power sources, which can affect the layout and design of your kitchen.

How to Choose Appliances That Complement Your New Kitchen Vision

Selecting new appliances is a cornerstone of remodeling a kitchen. You’ll want to ensure they not only match the aesthetic of your new space but also fit your kitchen’s dimensions. When it comes to the kitchen, many homeowners look for appliances that offer a blend of style and functionality. The right appliances can elevate your kitchen from a simple cooking space to a culinary haven.

Consider the longevity and energy efficiency of each appliance, as this is a long-term investment in your home’s utility and comfort. New appliances should not only look good but also make your kitchen easy to work in. Think about how often you cook, what kind of meals you prepare, and how new technology can make these tasks more efficient. For instance, an induction cooktop can offer precise temperature control, while a smart refrigerator can keep track of your groceries and help with meal planning.

Incorporating appliances that reflect the latest in kitchen technology can also be a game-changer. From refrigerators that can order groceries online to ovens that can be controlled remotely, the new appliances you select can add a level of convenience and efficiency that was previously unimaginable. As you integrate these new features, you’ll find that your kitchen isn’t just new in appearance—it’s also upgraded in its functionality.

How to Choose Appliances That Complement Your New Kitchen Vision

Cabinetry Choices: What to Know Before You Update?

Cabinets are the backbone of kitchen storage and play a pivotal role in defining your kitchen’s overall aesthetic. When you embark on a kitchen remodel, selecting the right cabinetry is a delicate balance between form and function. It’s not just about picking a pleasing colour or finish; it’s about ensuring your cabinetry meets your kitchen needs.

Consider the daily use of your kitchen cabinets. Soft-close features can add a touch of sophistication and prevent wear and tear, while sturdy hardware is essential for longevity. Think about the types of utensils, appliances, and cookware you’ll store. Do you need deep drawers for pots and pans, or would you benefit more from organizational systems within your cabinets for spices and utensils?

Moreover, the cabinetry should complement the design and remodel of your entire kitchen. If you’re going for a major kitchen remodel, you might consider custom cabinets designed to fit the exact dimensions and style of your space. For a minor remodel, updating your existing cabinetry with new doors or hardware could be sufficient. Remember, your cabinetry choices should reflect not only your kitchen’s current needs but also its future evolution.

amazing white kitchen cabinets

Setting Up a Temporary Kitchen: How Can You Make It Functional?

During a kitchen remodel, setting up a temporary kitchen is essential to maintain some normalcy. It’s not just about having a place to make coffee or toast bread; it’s about creating a space where you can continue to enjoy meals and sustain your household’s rhythm. To set up a temporary kitchen, identify a space in your home that can accommodate the essentials. A corner of your dining room or a part of your living room can be transformed into a functional kitchenette.

Equip this area with small appliances like a microwave, toaster, and perhaps a coffee maker. If possible, include another sink or a small refrigerator. Plan for meals that are easy to prepare in this limited setup. Stock up on disposable plates and utensils to minimize the need for washing up. This temporary arrangement will not only help you use your kitchen during the remodel but also provide a sense of continuity in your daily life.

Flooring Fundamentals: What Are Your Options?

The kitchen floor is a foundational design element that can influence the entire feel of your space. It’s not just a surface—it’s a statement. When selecting flooring for your kitchen remodel, consider both aesthetics and functionality. High-traffic kitchens will benefit from durable materials like ceramic tile or stone, which are easy to clean and maintain. If comfort is a priority, softer materials like vinyl or cork can be kinder to your feet.

Think about the colour and texture of your flooring. Will it complement your cabinetry and countertops? Does it fit with the overall design and remodel of your kitchen? Remember, the kitchen floor should be able to withstand spills, stains, and scratches, so choose a material that matches your lifestyle. Whether you’re a frequent entertainer or a home chef, the right flooring can make your kitchen not just a room, but a space where life happens.

Flooring Fundamentals

Surviving the Remodel: Tips to Keep Your Sanity Intact

Navigating a kitchen remodel requires a blend of preparation and flexibility. To keep your sanity intact, it’s helpful to maintain a list of tips that can guide you through the upheaval. Setting up a temporary kitchen is a crucial step that can make the difference between chaos and comfort. Equip this space with essentials like a microwave, toaster, and small appliances to ensure you can still enjoy home-cooked meals.

Communication with your contractor is also vital. Establish a clear timeline and regular check-ins to provide updates and track progress. It’s easy to get overwhelmed when your home feels like a construction area, but remember, this is a temporary phase. Take a few days to adjust to the new setup, and keep your eye on the prize: a beautiful new kitchen. With patience and a step-by-step approach, you’ll find the process manageable and the outcome rewarding.

Countertop Considerations: Selecting the Best Surfaces for Your Lifestyle

Countertops are more than just surfaces for meal prep; they play a significant role in defining your kitchen’s character. They need to be durable enough to handle daily use, yet stylish enough to complement your home’s aesthetic. When choosing countertops, consider how you use your kitchen. If you love to bake, a marble countertop might be perfect for rolling out dough, but if you’re into easy maintenance, quartz could be a better fit.

The material you choose should also reflect your style. A butcher block adds warmth and is ideal for a home with a rustic vibe, while polished granite suits a more elegant and modern kitchen. For smaller kitchens, lighter-coloured countertops can make the space feel larger and brighter. And don’t overlook the impact of the right countertop on the overall kitchen renovation—it can elevate the entire space.

Plumbing and Fixtures: A Step-by-Step Guide to Making Smart Choices

Selecting the right plumbing and fixtures is about combining functionality with aesthetic appeal. The kitchen sink and faucet, for instance, are not just utilitarian features but can serve as the centerpiece of your kitchen. When choosing a faucet, consider one with a high arc and pull-down spray feature for added versatility and ease of use.

Ensure that your plumbing is professionally installed and adheres to the latest building codes. The placement of fixtures should be strategic, enhancing the kitchen’s functionality and flow. For example, the sink should be positioned to allow for efficient workflow, and the faucet should be accessible and easy to operate. High-quality fixtures can also contribute to the kitchen’s overall design, adding a touch of elegance and sophistication.

Mother and her Daughter washing vegetables

Integrating New Appliances: How to Ensure a Smooth Transition

The integration of new appliances into your kitchen remodel should be executed with precision. Accurate measurements are critical to ensure that each appliance fits perfectly into the designated space. Consider the layout of your kitchen and the placement of outlets and plumbing when selecting appliances. This foresight will facilitate a smooth transition and prevent potential issues during installation.

As you choose your appliances and fixtures, think about how they will work together to create a cohesive look. The finish of your appliances should complement your cabinetry and countertops, creating a harmonious kitchen space. Additionally, consider the energy efficiency and technological features of new appliances, as these can enhance your kitchen’s functionality and your overall experience. With thoughtful planning, your new appliances will not only fit seamlessly into your kitchen remodel but also bring a new level of convenience and enjoyment to your daily routine.

Final Thoughts: Reflecting on the Transformation of Your Existing Kitchen to Your Dream Space

As your kitchen renovation project nears completion, take a moment to appreciate the journey. From the initial idea to the final touches, your dedication to creating your dream kitchen is about to pay off. The joy of stepping into your updated kitchen for the first time is a reward that will last for years.

,

Navigating the Full Process of Renovation Consulting

three construction-engineers working together side

Why Renovation Consulting is More Than Just a Project Plan

Renovating a space is a complex process that involves multiple stakeholders, from architects and contractors to team members who’ll be using the renovated space. This is where renovation consulting comes into play, guiding you through the project planning process from start to finish. The purpose of this process is to ensure that the project’s success is achievable and that everyone is on the same page.

asian contractor engineer-inspecting-material construction

What is the Difference Between Remodeling and Renovation?

Understanding the difference between remodeling and renovation can streamline the process and help stakeholders make informed decisions. Remodeling often involves structural changes, while renovation focuses more on restoring or updating existing structures. Knowing the type of process you’re involved in can help you measure success and identify the outputs of the process.

Why Do You Need a Process Map for Your Renovation?

A process map serves as a visual guide that outlines each step of the renovation. Process mapping helps team members understand their roles and responsibilities, ensuring that everyone is on the same page. This template can come in handy, especially when you’re juggling multiple tasks and contractors.

How to Navigate the Hiring Process for a Renovation Consultant

The hiring process begins with identifying the skill set you need for your project. Prepare a set of interview questions to ask candidates during the interview process. This will give you a sense of who is the right fit for the role. The hiring manager or recruiter should also be prepared to answer questions from the candidate. After the interview, it’s time to review the candidates and decide who will get the offer in hand.

close hands businessman-consultancy service discussing

What Type of Process Should You Expect in Renovation Consulting?

The process usually starts with an initial consultation where the consultant assesses the scope of the project. This is followed by a series of meetings with stakeholders to discuss various aspects like budget, timeline, and design preferences. The consultant then creates a detailed project plan, often using a template for efficiency, which serves as the roadmap for the renovation.

How to Create a Process from Start to Finish

Creating a process involves several steps, from initial planning to finalizing the design and construction. Each step should be clearly outlined in the project plan, with specific roles and responsibilities for each team member. This ensures that the project runs smoothly from start to finish.

The Importance of Process Documentation in Renovation Consulting

Documentation is key to any successful renovation project. It helps keep track of changes, decisions, and approvals from stakeholders. A well-documented process also makes it easier to resolve any disputes or issues that may arise during the project.

Benefits of Following a Structured Process in Renovation

A structured process offers several benefits, including better communication among team members, more efficient use of resources, and a higher likelihood of completing the project on time and within budget. It also provides a template that can be used for future projects, making it easier to plan and execute renovations down the line.

What Should Be Included in Your Renovation Project Plan?

Your project plan should include a detailed timeline, budget estimates, and a list of all stakeholders involved. It should also outline the expected output at each stage of the project, from initial designs to the final construction.

clipboard words renovation estimate work tools

Template or Custom Plan: Which is Better for Your Renovation?

While templates offer a quick and easy way to get started, a custom plan allows for more flexibility and creativity. The best approach often involves a combination of both, using a template as the base and customizing it to fit the specific needs and preferences of stakeholders.

Best Practices for Navigating the Renovation Process from Start to Finish

Renovation consulting is not just about creating a beautiful space; it’s about managing a complex process that involves multiple stakeholders and team members. By following best practices and using tools like process maps and templates, you can streamline the renovation process and ensure a successful outcome for everyone involved.

Key Takeaways for a Successful Renovation Journey

To wrap up, here are the most important things to remember as you navigate the intricate world of renovation consulting:

  • Understand the Terminology: Knowing the difference between “remodeling” and “renovation” can help you make informed decisions and streamline the process.
  • Involve All Stakeholders: From team members to contractors, everyone’s input is valuable. Make sure all voices are heard to ensure a successful outcome.
  • Use a Process Map: A visual guide can be a game-changer, helping team members understand their roles and responsibilities.
  • Choose the Right Consultant: The right consultant can make or break your project. Look for someone who understands the needs of all stakeholders.
  • Create a Detailed Project Plan: This should include timelines, budgets, and expected output at each stage. A well-laid-out plan is your roadmap to success.
  • Document Everything: Keep records of all decisions, changes, and approvals. This will help resolve any disputes and can serve as a template for future projects.
  • Structured Process is Key: A well-structured process ensures better communication, efficient use of resources, and a higher likelihood of completing the project on time and within budget.

To start off on the right foot, contact Honest Renovations, an experienced team of contractors with many home and commercial renovation projects under their tool belts.

Benefits of Home Addition: Expanding Your Space

Benefits of Home Addition

Are you feeling cramped in your current living space? Considering a benefits of  home addition might be the perfect solution. In this article, we explore the benefits of expanding your home through an addition project.

Firstly, it provides you with valuable extra space to accommodate growing families or fulfill your personal needs. Additionally, the added value of a well-executed home addition can significantly boost the market value of your property, making it a wise investment.

Keep reading to discover how embracing a home addition project can enhance your living experience while increasing your home’s overall worth.

Adding On: The Benefits of Home Additions

Adding on to your home offers numerous benefits that can transform your living experience. One of the primary advantages is the creation of more square footage, allowing you to accommodate your evolving lifestyle needs.

Whether you desire an extra bedroom, a home office, or a larger kitchen, a home addition provides the flexibility to customize your living space. Furthermore, a well-designed and professionally executed addition can significantly increase the value of your home, offering a solid return on investment.

Embrace the possibilities and enjoy the enhanced and improved comfort, functionality and value that a thoughtfully planned home addition brings.

Specialized Space

One of the key advantages of a home addition is the opportunity to create specialized spaces tailored to your specific needs and interests. Whether it’s a dedicated home gym, a music room, a guest bedroom, a cozy reading nook, or a hobby room for your artistic pursuits, a specialized space adds a personalized touch to your home.

These purpose-built areas enhance your daily life, allowing you more ways to indulge in your passions and hobbies within the comfort of your own home. Unleash your creativity and design a space that truly reflects your unique lifestyle.

Increased Storage

A home addition can greatly increase your storage options, helping you declutter and organize your living space. With additional square footage, you can incorporate built-in closets, cabinets, or even a full basement or dedicated storage room.

This allows you to make room additions to keep belongings neatly stowed away, maximizing your home’s functionality and creating a more streamlined, organized environment. Say goodbye to clutter and embrace the benefits of increased storage.

Room for More Family Members

Room for More Family Members

When your family grows, a home addition becomes a practical solution. By expanding your living space, you can accommodate additional family members comfortably. Whether it’s a guest room, nursery for a new baby, space for elderly parents, or a room for adult children, a home addition offers the flexibility to adapt to changing family dynamics.

With more room, you can ensure everyone has their own space while fostering a sense of togetherness. Embrace the opportunity to create a larger home that grows with your family’s needs.

Surpass Other Ways of Adding Space and Natural Light

Compared to other methods of adding space, such as moving to a new house or remodeling an existing house or rooms, a home addition offers unique advantages. It allows you to stay in your beloved neighborhood, avoids the hassle of packing and moving, and provides a customized solution tailored to your exact specifications.

A home addition ensures your project lets you maximize space and natural light while maintaining the familiarity and comfort of your current home.

House Additions Use up Property Space

House additions make efficient use of your property space, maximizing its potential. Instead of only expanding outward, home additions can go upwards as well, minimizing the need for extensive landscaping or compromising outdoor areas.

This approach allows you to add rooms to enhance your living space while preserving outdoor amenities such as gardens, yards, or recreational areas, maintaining the overall balance and functionality of your property.

A Bedroom Addition

A Bedroom Addition

Adding a bedroom to your home through an addition brings numerous benefits. It provides a private retreat for guests, a dedicated space for a growing family member, or even an opportunity to create a luxurious master bedroom suite.

A bedroom addition increases the functionality, comfort, and overall value of your home, enhancing its appeal and livability.

Great Cost to Value Ratio

When it comes to home improvements, a well-planned and executed addition project offers a great high cost-value ratio. The investment made in expanding your home’s floor space is often reflected in a significant increase in its market value. With careful planning and quality construction, a home addition can provide a favourable return on investment, making it a wise financial decision for homeowners.

An Economical Solution to Moving

Rather than going through the costly and time-consuming process of moving, a home addition offers an economical alternative. It allows you to create more space within your existing property, eliminating the need for purchasing a new home or paying for relocation expenses.

This cost-effective solution allows you to stay in your home office or desired location while achieving the extra space you need.

,

Perfect Kitchen Design: Expert Tips & Tricks

How to Design the Perfect Kitchen

Designing the perfect kitchen for your family involves more than just choosing the right appliances and color scheme. A well-planned kitchen renovation can improve functionality, increase your storage space, improve task lighting, and make cooking and entertaining more enjoyable.

Keep reading to explore some key considerations for your own kitchen makeover that meets your family’s unique needs and preferences.

Budget Guidelines for a Major Kitchen Remodel

A major kitchen remodel can be a costly undertaking, so it’s important to establish a realistic budget before you begin. As a general rule, you should plan to spend between 5% and 15% of your home’s value on a kitchen renovation. However, the final cost will depend on factors such as the scope of the project, materials chosen, and any necessary structural changes.

What Is the Average Cost to Update a Kitchen?

The cost to update a kitchen can vary widely depending on the scope of the project and materials chosen. A minor update such as painting existing cabinets and replacing hardware can cost a few thousand dollars, while a major renovation can cost tens of thousands if you like expensive offerings such as oak cabinets. On average, a mid-range kitchen remodel typically costs around the national average of a new car.

What Are the Hottest Trends in Kitchen Remodel Ideas?

Kitchen design trends are constantly evolving, but some popular themes have emerged in recent years. These trends prioritize functionality, natural materials, and a minimalist aesthetic. Incorporating these elements can give your kitchen a modern, fresh feel while improving its functionality and increasing its value.

Terra Cotta Tiles

Terra Cotta Tiles

Terra cotta floor tiles are made from natural clay and are known for their warm, rustic charm. They come in a variety of shapes, sizes, and finishes, and are durable enough to withstand heavy foot traffic. However, they do require regular sealing and maintenance to protect against stains and scratches.

Curved Edges

Curved edges have become a popular design element in modern kitchens. From curved granite countertops and kitchen island geometry to rounded wall cabinets and stainless steel appliances, these soft shapes add visual interest and a sense of flow to the space. They can also help to create a more welcoming and inclusive atmosphere by avoiding harsh angles and corners.

Butcher Block Countertops

Butcher block countertops are a classic and functional alternative to quartz countertops, limestone countertops, and other luxury mainstays for counter space. Made from solid wood, such as maple or oak, they provide a durable and versatile work surface that can be used for food preparation, chopping, and slicing. However, they do require regular oiling and maintenance to protect against scratches, stains, and bacteria.

Copper Accents

Copper accents are a popular choice for adding warmth and visual interest to kitchens. From copper new cabinet hardware and fixtures to range hoods, upper cabinets and backsplashes, these metallic touches can add a touch of elegance and sophistication to the space. Over time, copper develops a natural patina that only adds to its unique charm.

Reclaimed Wood

Reclaimed Wood

Reclaimed wood is a sustainable and eco-friendly choice for adding texture and character to kitchen designs. Salvaged from old barns, factories, and other structures, this type of wood is highly sought after for its unique, weathered appearance. From accent walls and gray cabinets to flooring and painted cabinets, it can add warmth and a sense of history to any kitchen.

Paint and Save on Upper Cabinets

Painted custom cabinets are a cost-effective way to give your kitchen a fresh look without the expense of a full remodel. With the right tools and techniques, it’s a DIY project that many homeowners can tackle themselves. However, it’s important to properly prep and prime the surfaces to ensure a smooth and durable finish.

Think About Wood-Look Flooring Alternatives

hardwood flooring

While hardwood flooring is a classic choice for kitchens, there are now many wood-look alternatives that offer the same warmth and durability with added benefits such as waterproofing and easier maintenance. From luxury vinyl planks to porcelain tile, these alternatives can provide a more budget-friendly and practical option for kitchen flooring.

Keep Character and Functionality in Mind When Choosing a Subway Tile Backsplash

Choosing a backsplash for your kitchen is an opportunity to add both style and function to the space. It’s important to consider the durability and maintenance requirements of the material, as well as how it complements the overall design aesthetic. From ceramic tile to natural stone, there are many tile backsplash options, such as white subway tiles, that can add character and charm while also protecting your walls from splatters and stains.

Final Thoughts

A kitchen renovation can be a major undertaking, but by carefully considering your options and priorities, you can create cabinet space that is both functional and beautiful. From timeless materials like natural wood and stone to modern trends such as copper accents and curved edges, there are many ways to personalize your kitchen and make it a true reflection of your family’s needs and style.

,

Drywall Installation : Tips and Tricks For A Smooth Finish

A man drilling a hole in the wall.

Drywall, also known as gypsum board, is a premium building material used in many residential, commercial, and industrial buildings. Learning how to hang drywall properly using basic tools can be quite easy with the right information.

Best Tips For Hanging Drywall 101

Hanging drywall isn’t rocket science, but you definitely need to have a knack for it. Here are some drywall hanging tips and tricks to help you achieve the perfect finish when installing drywall.

Prepare The Right Tools

Before you begin hanging drywall, you need to ensure that you have all the necessary tools. Some essential tools for hanging the drywall include a drywall or utility knife, a drywall saw, a drywall square (that acts as a straight edge), a drywall screw gun, a cordless drill, and drywall screws. Depending on the height of your ceilings, you may opt to rent a drywall lift so that you are able to reach higher. Having the proper tools on hand can make the work easier. Most of these can be found at your local hardware stores.

Choose The Right Drywall

Next, you will want to ensure that you have the right drywall sheet. The type of drywall you choose can impact the smoothness of your finished walls. If you are looking for a smooth finish, then you should consider using a lightweight sheet of drywall. Lightweight drywall is easier to handle and can provide a smoother finish compared to traditional drywall.

Prepare Your Wall

Before you can even begin installing the drywall, you need to prepare your wall surfaces and edges. You can do this by removing any old drywall or wallpaper, sanding down any rough or uneven spots, and cleaning your walls can ensure that your new drywall sticks to your wall surface evenly. If your home has wood framing members, you have to ensure that these framing members are aligned in a straight plane.

Plan Your Layout

Next, you will need to carefully plan the layout before hanging drywall. Be sure to measure your walls accurately and plan where each piece of drywall panel will go, especially the first panel or first sheet. Plan for any obstacles, such as electrical outlets, an electrical box, ceiling fixtures, window, and door openings, or light switches, and cut any necessary access holes. As a rule of thumb, you can add a 1/4 inch for easier installation. 

Use Level Lines

Throughout the entire process, you will want to ensure that you have straight lines, especially around a door or window corner, window openings, and inside corners. Using level lines from the top to the bottom row can help ensure that your drywall is installed evenly and that you have straight edges when you cut openings for things like electrical boxes, windows, and doors. When installing the wall panels alone, you can use two screws that are level and can rest the bottom edge on them to help hoist up the panel.

Cut Your Drywall Carefully

A great drywall job means well-cut drywall paper. When cutting drywall, be sure to use a sharp knife or saw to ensure a clean break on the paper face. You can do this by running a cutting blade down the sheets with a straight edge and drywall or T square. You can cut through the paper backing and remove any waste.

Install Drywall In Staggered Patterns

When installing or hanging drywall, be sure to install it in staggered patterns as you drive screw heads into the frames. You can use the same strategy to drive screws into the ceiling as you do the walls. However, you should avoid having the spiral bit breaking through the gypsum core or drywall compound as this will damage the integrity of the material. Staggering your drywall can help ensure that your walls have a smoother finish by reducing the number of seams.

Apply Tape and Joint Compound

To create a smooth finish after the final coat, you will need to apply tape and joint compound to the seams between your drywall sheets and cover the butt joints. You should avoid placing joints over doors and window corners as they can crack. Be sure to apply the tape and joint compound evenly, using a drywall knife to smooth it out. For outside corners, be sure to apply compound to both sides.

Sand and Repeat

After applying the tape and joint compound, you will need to sand the surface of your walls. Be sure to use fine-grit sandpaper and sand until it has a smooth surface. You may need to repeat this process several times to achieve the perfect finish. Then, you can finish the project off with a coat of paint.

Work With Professionals

Still unsure about doing it yourself? Trust the professionals at Honest Renovations to complete the process properly, from the first coat to the last and from the floor to the ceiling. Contact us today to see how we can help!

Commercial Renovations: Enhancing Functionality

Kitchen Design Strategies

A commercial renovation might be one of the only things that your business property needs in order to increase its value in the market or its usefulness to your business. It’s important to note that renovations of commercial buildings shouldn’t be done for aesthetic purposes only but also for the safety of everyone in the building and the functionality of the business space.

Your commercial business space should be a convenient and functional space for a business, its employees, and its customers. For this reason, you should make sure that your commercial space or business space ticks all the boxes for your tenants as promised in your contract without any complications.

Keep reading to find information on best practices when upgrading your office building and business facilities, as well as general details on renovating business spaces for functionality and aesthetics.

Tips To Ensure The Success Of A Commercial Building Renovation Project

Like any renovation project, there are a lot of important factors at play that can affect the effectiveness of your commercial renovation process. With a commercial renovation, however, the scale of any given project is generally much larger than typical residential renovations. They may include upgrading systems or changing entire layouts to accommodate new technology or functionality.

The specific recommendations will also be different depending on what kind of business your corporate office space is used for. Restaurants, for example, have very different technological and logistical requirements compared to call centres. Being aware of all this ahead of time will make your project run a lot smoother at the end of the day.

Finally, it is of the utmost importance throughout the entire renovation process to make sure you are complying with any and all permit requirements, construction regulations, and safety measures that typically go into large-scale renovations. Inspections after the renovation is complete will also be necessary.

How Long Does It Take To Renovate A Commercial Building?

The size, and complexity of the project determine how long it will take to renovate a business space. While smaller-scale renovations, like designing a completely new floor plan, can take eight months or longer, larger-scale projects, like updating paint and carpeting, may only take a few weeks.

It’s critical to take the estimated cost into account when estimating a timeline for a commercial renovation job. Projects with a smaller budget might need to adhere to a shorter timetable because remodelling a commercial building can cost anywhere from less than $40 per square foot to up to $250 per square foot based on the size and duration of the construction project.

Define Your Goals

A commercial renovation endeavour is always working towards two main objectives. To enhance both usability and aesthetic attractiveness. No matter what kind of company you work with, investing in general appeal and functionality pays off.

For instance, improving the comfort and safety of your workplace space can boost workers’ productivity as a whole. Similar to this, remodelling a restaurant to give it a fresh look can bring in more patrons who would like to sample your menu.

Have A Contingency Budget

Consult your contractor first about the renovation plans and associated costs before beginning any work on a commercial property. Making decisions with commercial contractors about what to focus on first is made easier with a detailed and organised budget. Due to poor planning and budgeting, most people who renovate their business buildings end up spending more money.

A backup budget of at least 10% more is advised to account for future unforeseen costs.

Hire Qualified Contractors

A contractor who can perform high-quality work on schedule and with whom you feel at ease communicating is ideal for your building or renovation projects. Choose a candidate who has a resume or references you can contact to learn more about their attitude, level of knowledge, and work ethic.

Create A Realistic Schedule

You should take your time finalising everything with your contractor before beginning your remodelling. Ensure that both sides understand everything. For easy monitoring of the construction process and fewer job interruptions, it is best to outline everything.

Focus On Sustainability For Your Commercial Renovation Project

Over the past few years, the construction and renovation industries have changed, and more professionals and commercial contractors are becoming interested in streamlining their projects with an emphasis on sustainability. Utilizing environmentally friendly materials and looking into more innovative methods to renovate effectively will help reduce waste.

For instance, you can use LED illumination and solar panels.

Capitalize On The Building’s Strengths

You should first ascertain what the structure does well before deciding what to renovate. Does it already allow enough light into the structure? Is the height from floor to ceiling adequate? You can concentrate on any areas for improvement once you are aware of your building access, amenities, strengths, and weaknesses.

,

How To Install A Kitchen Sink

newly installed stainless steel sink

Do It Yourself home improvements can not only be extremely rewarding but can also give your home a breath of fresh air. Installing your sink, while a little messy, can be done by homeowners in a few hours.

Installing A Kitchen Sink In 8 Steps

brand new kitchen sink installed at home

Ready to start installing your brand-new kitchen sink? Here’s your guide with all the information you’ll need for your kitchen sink upgrade.

Prepare Your Tools | What You Will Need

As you get ready to make the cut and start installing your sink, there are a few tools you should have on hand when you start the process. These tools include:

  • Putty Knife 
  • Utility Knife
  • Plumber’s Putty
  • Sink Clips
  • Slip Nuts
  • Silicone Caulk 
  • Bar Clamp or Hose Clamp
  • Shop Towels
  • Pipe Wrench
  • Safety Glasses
  • New Sink and Faucet

Measure Your Space and Find A Sink That Fits

One of the first things you need to do in your kitchen sink installation is to measure your space and buy a new appliance. Measuring is so important or else you’ll be heading back to the home improvement store. Be sure to measure the sink tailpiece between the basket and the tee. While it’s easiest to replace a kitchen sink with one of the same size, you can try for a larger sink or a smaller sink if you’re willing to put in the extra work.

Turn Off Water Supply and Drain Lines

The next step is to turn off your hot and cold water lines and your drain lines. While you’re underneath the sink looking at the water supply valves, you should also inspect the condition of the shut-off valves and supply pipes. You definitely don’t want to start installing your new sink if the pipes are stacking or need to be replaced. Next, remove any remaining water in your sink drain pipe before you get started on taking out the existing sink. Remove any clips beneath the appliance in the sink cabinet that would be holding it in place. The line for the dishwasher drain is typically connected to the drainpipe under the sink in most cases.

Remove Your Old Sink and Clear The Space

Once the water has been turned off, you can remove the old sink bowl from the countertop opening. Be sure to wear safety glasses throughout this entire installation process. Depending on the size of your sink, you may need to do some cutting around the sink’s perimeter and on the counter’s edge with a tile cutter or utility knife.

TYPES OF SINKS

If you have a drop-in sink, you can have one person push the drop in the kitchen sink from underneath while another person pulls it up and out of the countertop hole using the sink’s lip for a grip. For an under mount sink, you will need to loosen the clamps and lower it down into the sink opening. Sinks, especially under mount sinks, can be heavy and hard to remove. Work cautiously when completing this step and cut away any remaining caulk leftover along with the old appliance.

small drop in sink newly installed

Prepare The New Sink and Install New Faucet Lines

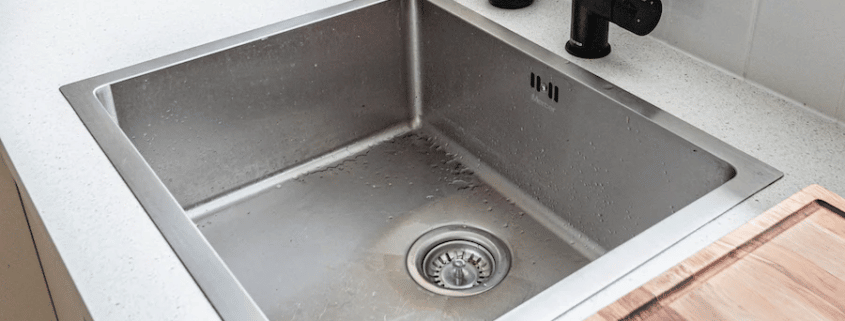
The next step in the sink replacement process is to prep the new sink. Many stainless steel sinks have a terrible smell and require a good cleaning before they are installed. After the scrub, keep the sink upside down and place a good amount of putty around the drain hole and apply the drain strainer. Attach a rubber gasket onto the strainer with a slip nut.

INSTALL FAUCET FIRST

As well, many professionals recommend installing the kitchen faucet for the new sink before the actual sink. While you install the kitchen faucet, you can also install the garbage disposal, soap dispenser, and other extra features your sink has using a mounting bracket and mounting nuts under the sink.

Install New Sink According To Manufacturer’s Instructions

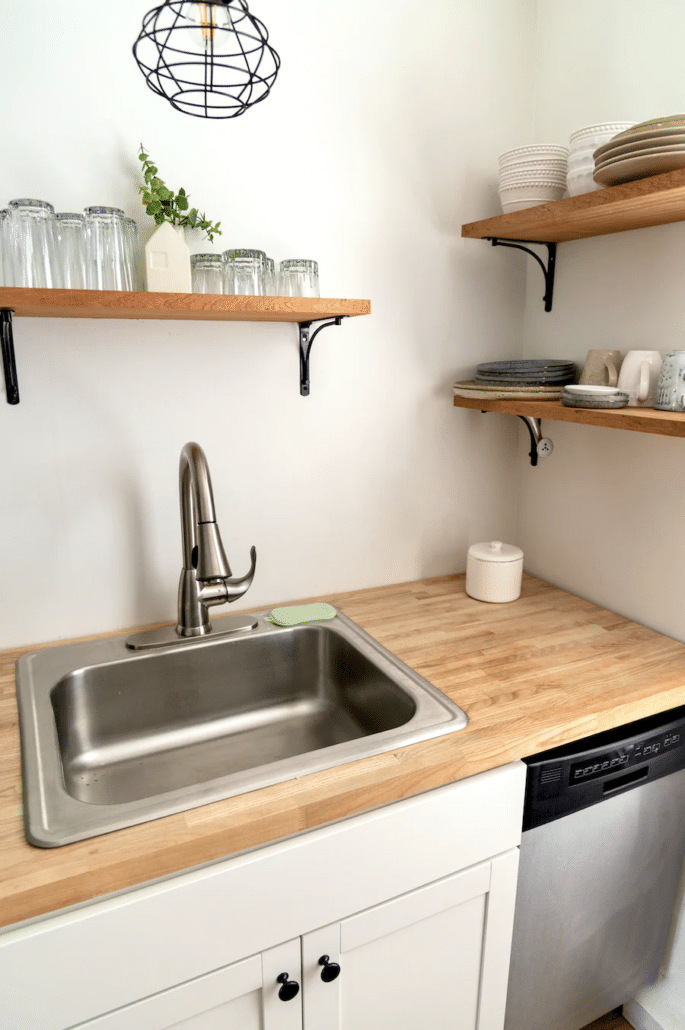
It’s finally time to install the sink itself! After prepping the sink and installing the kitchen faucet and garbage disposal, you are now ready to place the appliance into the hole. Be sure to follow the manufacturer’s instructions for the installation and sinks can look and act differently depending on brand and material. Use putty to secure the sink and then remove the excess putty from the edges. Connect the faucet to the shutoff valves and ensure that the sink is fitted correctly.

Turn On Water Supply and Check Water Pressure

Once everything has been connected again, you can turn on the hot and cold water supply lines and drain lines again. You will want to check that everything is working correctly and that the water’s pressure is where it should be. Missing this step could lead to other trouble down the line. 

Clean Up

Finally, when you are all finished and everything is working correctly, you can clean up. Remove excess caulk and putty, scrub your sink again, and replace any products for the cabinets underneath that you moved to install your sink. Then, you can wash your hands of this job!

Honest Renovations

If you don’t like to get your hands dirty and are looking for some professional help with your sink installation, contact Honest Renovations today to get started on your new project!

,

Small Kitchen Renovation Ideas

Kitchen Cabinet Repainting

If you’re living in a small apartment or flat, it’s crucial to have a kitchen layout that maximizes storage space and efficiency, as well as incorporates practicality and design.

Depending on the facade and ambiance you want, there are ways to take on your small kitchen renovation project. You don’t need to spend a large amount on kitchen renovation. You can upgrade it by replacing some furniture, fixtures, and stainless steel appliances or do a considerable kitchen remodel that needs a restructure of the entire room. Here are some of the best small kitchen ideas to help create the kitchen of your dreams.

10 Small Kitchen Remodel Ideas You Can Apply To Your Home

Add An Efficient Kitchen Island

An island cut out to a small kitchen structure is a practical space-saving solution. It functions as a counter space, dining table or breakfast bar, and extra storage, enhancing the surfaces accessible in a small space. But note that a portable kitchen island exists if you want to avoid constructing a fixed island into the floor space. Move it in if necessary and wheel it to the side when you want the room.

A kitchen island’s correct size and dimension can make a small kitchen bigger.

Use Reflective Surfaces

Reflective surfaces, like marble countertops, ceramic tile, or stainless steel, bounce light back across the room, boosting the effects of natural and artificial light and adding a sense of depth. Plus, incorporating the right mirror into your kitchen instills a touch of elegance. And when applying high-gloss paint, including the ceilings, as well.

Go Brighter

The brighter your kitchen, the bigger it will appear. Provide enough light into the area. Choose window treatments that allow you to use natural light or install some light fixtures.

Lighting can transform your small living space and make it more stylish and structured. Pendant lights won’t overwhelm the area and can deliver the illusion of more room. It’s also essential to include task lighting (e.g., in the sink area) to increase the functionality of your kitchen, and avoid knife mishaps!

Classic Touch To Kitchen Finishes

Keep the kitchen room classy and timeless with monochromatic themes. A monochromatic colour scheme will align your kitchen design and visually expand the space.

A white kitchen just feels good; the clean and fresh look that white cabinets and countertops bring. You may also consider a light-toned kitchen with white, off-white, or soft gray cabinets. Add small doses of black, such as matte black cabinets, for that stylish punch. The big-contrast blend of black and white makes a stunning small kitchen colour palette, adding visual interest.

Repurpose Furniture For Storage

Usually, you will discover traces of cabinet space or irregular corners that are laid open and could be used as a kitchen space. Filler drawers are excellent ways to take advantage of spacings that are best for cooking utensils and condiments. Lower cabinets are also perfect for kitchen storage to take in counter appliances like a coffee machine, stand mixer, and toaster.

Maximize Space

In functional kitchens, countertop space is valuable. Fill unused and pointless areas with a freestanding butcher block and bar cart. Also, get creative with pull-outs, a hidden chopping board with a garbage ramp and receptacle beneath, enhancing kitchen work surface functionality. A popular space-saving trend is having frequently used appliances slide out in shallow drawers installed in cupboards. This saves valuable workspace and makes the kitchen feel less cluttered.

Add Open Shelves

When tailored, open shelving can serve as a lovely display in your kitchen. But if you have a small space, it offers additional storage and can make your tiny kitchen feel roomier. Not to mention the indulgence of always seeing all your kitchen items and collection, especially if it’s beautiful or has been passed down from generation to generation!

Choose Modern & Practical Appliances

You can save plenty of space by opting for multi-purpose kitchen appliances. Appliances that work as double-duty are popular nowadays, like a microwave-convection-browning appliance and an innovative kitchen sink with a built-in dishwasher. High-quality small appliances are also in-demand to maximize the efficiency of a small kitchen.

Paint Your Walls

Cover an entire wall in one vivid colour to create a calm environment. But if you don’t know which colour to choose – you feel you want neutral hues, or you’re just a tenant who wants to avoid risking your security deposit – just paint an accent wall.

Accent walls are the best way to generate a statement, regardless of your kitchen’s size, and they don’t need any electric tools.

Let Your Kitchen Expand

When renovating, you can specify your kitchen layout. Therefore, if you like to stretch your cabinets over your dining room, feel free. Use a low half-wall to partition your breakfast nook and your cooking area. Doing so allows you to maintain the feeling of the spaces connected and look like a typical extension of your kitchen. It even provides some breathing room to the design of your house.

Are You Ready For A Kitchen Renovation?

If you want to renovate your kitchen, proceeding with a DIY process seems reasonable in particular circumstances. But there are many cases where hiring a professional interior designer or contractor is the right option. A professional kitchen remodeler gives tips, suggestions, and ideas on optimizing your kitchen space.

When you are looking for a highly competent general contractor, contact Honest Renovations today. Call us at (289) 260-2462 and be ready to get started with your renovation process.