Easy Guide: How to Install Drywall Anchors Correctly
Ever found yourself in the middle of a DIY project, excited to hang that new piece of art or shelf, only to hear the dreaded sound of your hard work crashing down? That’s where drywall anchors come to the rescue. These nifty gadgets are your best bet for a secure hold in the often flimsy drywall.
Whether you’re working with self-drilling anchors or the more complex snap toggles, the right approach will have you hanging fixtures like a pro in no time. Let’s get into the nuts and bolts of installing drywall anchors effectively.
What are Drywall Anchors?
Drywall anchors provide a secure grip for screws and bolts in the relatively soft and brittle material of drywall. They make it possible to hang heavy objects without the fear of them falling due to insufficient support.
Types of Drywall Anchors
Several types of anchors exist, each designed for specific load capacities and applications:
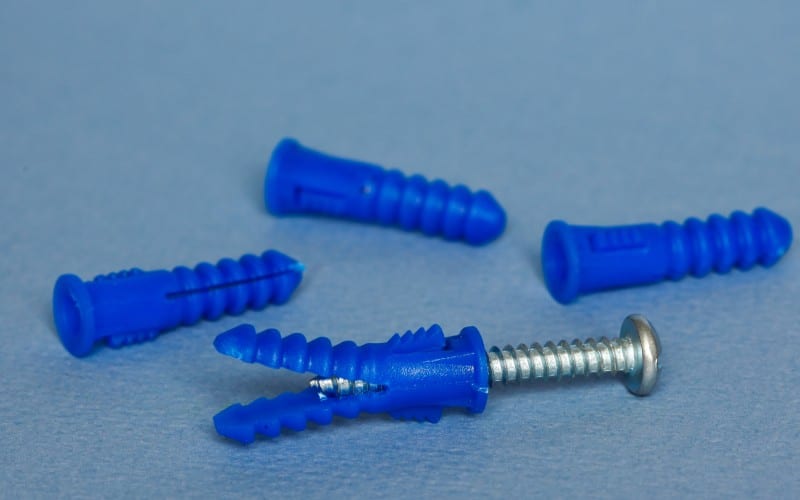
- Expansion anchors: Ideal for light to medium loads, they expand against the drywall as a screw is tightened into them.
- Threaded drywall anchors: These self-drilling anchors require no pre-drilling and are suited for holding medium loads.
- Hollow-wall anchors: These need pre-drilled holes and are great for medium to heavy loads, featuring a metal body that expands behind the drywall.
- Toggle bolt anchors: Best for the heaviest loads, a metal wing unfolds behind the wall, spreading the weight across a larger area.
When to Use Drywall Anchors
You’ll need to use drywall anchors in situations where:
- The object you’re hanging is too heavy for a simple nail to support.
- There’s no stud located where you wish to hang the item.
- Secure and long-lasting installation is required for items that are used or moved frequently, like towel racks or curtain rods.
Remember, using the right type of anchor is crucial for the safety and longevity of your wall hangings.
Tools and Materials Needed
List of Tools
When you’re ready to install drywall anchors, you’ll need a specific set of tools to perform the job correctly and safely. Ensure you have the following items at hand:
- Hammer: Essential for tapping anchors into place gently without damaging the surrounding wall.
- Screwdriver: A must-have for twisting screws into the anchors to secure the object you’re hanging.
- Power Drill: For creating pilot holes of appropriate sizes, a power drill is highly efficient and saves time.
- Drill Bit Set: You’ll need various sizes to match the drywall anchors you’ve chosen, ensuring a snug and proper fit.
- Stud Finder: This tool helps you to avoid drilling into a stud, which is unnecessary when using anchors and could lead to over-constraining the wall material.
Remember, the right tools will not only make the job smoother but will also prevent mishaps such as cracked drywall or insufficiently secured items.
List of Materials
The materials required for installing drywall anchors involve different types of anchors and fasteners, each tailored to the weight and size of the objects you’re hanging:
- Expansion Anchors: Ideal for lightweight items, utilizing the spreading mechanism to grip the drywall.
- Threaded Drywall Anchors: More robust than expansion types, these are suited for medium loads and can be driven in without pre-drilling.
- Hollow-Wall Anchors: Great for heavier objects, they expand behind the wall providing increased stability.
- Toggle Bolt Anchors: Best for the heaviest items; metal toggle bolts are resilient, while their plastic counterparts are for lighter loads.
- Screws: Necessary to secure into the anchors and vary in length and thickness depending on the anchor type and the object’s weight.
By choosing the correct anchor for your object’s weight and the appropriate screws, you’ll ensure a strong hold that lasts, keeping your walls and hung objects intact and secure.

Steps to Install Drywall Anchors
Step 1: Mark the Spot
Finding the precise location for your drywall anchor is crucial. Use a pencil to mark the wall where you plan to hang the item. For precision, a level helps ensure that your marks are perfectly aligned, especially when installing multiple anchors.
Step 2: Choose the Right Anchor
Selecting the proper anchor depends on the weight of the object and the wall type. Threaded drywall anchors work best for lighter items, while toggle bolt anchors are ideal for heavier loads. Always check the anchor’s weight capacity mentioned on its packaging.
Step 3: Preparing the Anchor
Examine the anchor and ensure all components are present. For snap toggle anchors, ensure that the wings can move freely, and for self-drilling anchors, that the threads are intact.
Step 4: Drill the Pilot Hole
If your chosen anchor requires a pilot hole, drill one using the correct size drill bit. The hole should be slightly smaller than the anchor to ensure a snug fit. The anchor’s packaging typically indicates the necessary drill bit size.
Step 5: Insert the Anchor
For anchors that require tapping in, use a hammer to lightly drive them into the wall at the marked spots. For self-drilling types, apply gentle pressure and screw them in until flush with the drywall. Avoid using excessive force to prevent damage to the wall.
Step 6: Secure the Anchor
Once the anchor is in place, use a screwdriver to insert the screw. Turn it clockwise until it’s secure but not overtightened – this might cause the anchor to fail. If you’re using a drill, set it to a low torque setting and proceed with caution.
Step 7: Test the Anchor
Gently pull on the anchor to test its hold. If it doesn’t move or loosen, it’s ready to support your object. Attach your fixture or hang your item and apply gradual weight to ensure the anchor maintains its grip.
Remember, each type of anchor has its specific instructions for best use, so it’s vital to follow the manufacturer’s guidelines for optimal performance.
Consider the Weight of the Object
The integrity of your installation depends largely on matching the anchor to the weight of the object you’re hanging. Heavy items require sturdier anchors such as toggle bolts or molly bolts, which can handle a greater load. Below is a quick reference guide for weight capacities of common anchor types:
| Anchor Type | Weight Capacity |
| Plastic expansion anchors | Up to 8 kg |
| Self-drilling anchors | Up to 22 kg |
| Molly bolts | Up to 22 kg |
| Toggle bolts | Up to 45 kg |
Always verify the manufacturer’s weight ratings. Exceeding the recommended weight limit can lead to anchor failure.
Conclusion
You’re now equipped with the knowledge to install drywall anchors confidently. Remember, the key to a secure and lasting hold is in the details—select the right anchor, mark your spot with precision, and avoid overtightening. Your diligence in these steps will pay off when your wall hangings stay firmly in place. With these tips in hand, you’ll tackle any drywall project like a pro. Go ahead and hang that shelf or artwork, knowing you’ve done the job right.


Leave a Reply
Want to join the discussion?Feel free to contribute!