Easy Guide: Install Drywall Corner Bead Like a Pro
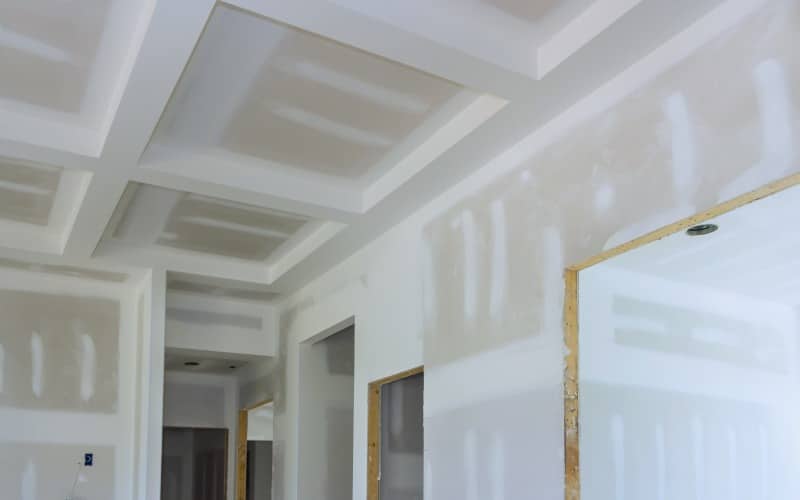
Achieving that crisp, professional finish on your walls hinges on the proper installation of drywall corner beads. It’s the unsung hero that guards the vulnerable corners of your drywall against chips and dents. Whether you’re a DIY enthusiast or a seasoned pro, understanding the nuances of installing corner bead is crucial.
You’ve probably seen the sleek edge that runs along the corners of well-done walls—that’s the handiwork of a well-installed corner bead. With a variety of materials like metal and vinyl at your disposal, you’ll want to choose the right one for your project.
Preparing the Wall
Remove Any Existing Corner Bead
If you’re working with a pre-existing wall, you might need to remove an old corner bead. To do this effectively:
- Gently tap a putty knife or a chisel under the edge of the bead.
- Pry the corner bead away from the drywall carefully to avoid further damage.
- If the bead is nailed or screwed in, you might need to remove these fixings with the appropriate tools.
Carefully removing old corner beads minimizes wall damage, making it easier to prepare the surface for the new installation.
Check for Any Wall Damage or Imperfections
Next, you’ll want to inspect the corner for any damage or imperfections:
- Look for dents, holes, or gouges in the drywall.
- Use a straightedge to check for bulges or indentations.
- Make note of any cracks that could impact the integrity of the new corner bead.
Rectifying issues with wall damage or imperfections ensures a smooth and stable base for your corner bead, preventing future complications.
Clean the Area Around the Corner
Finally, make sure the area is clean:
- Dust off any debris with a broom or a brush.
- Wipe down the corner with a damp cloth to remove fine dust particles.
- Allow the surface to dry completely before proceeding.
A clean work area promotes better adhesion of the joint compound to the drywall, a crucial step in securing the corner bead in place.
Measuring and Cutting
Measure the Length of the Corner to Determine How Much Corner Bead is Needed
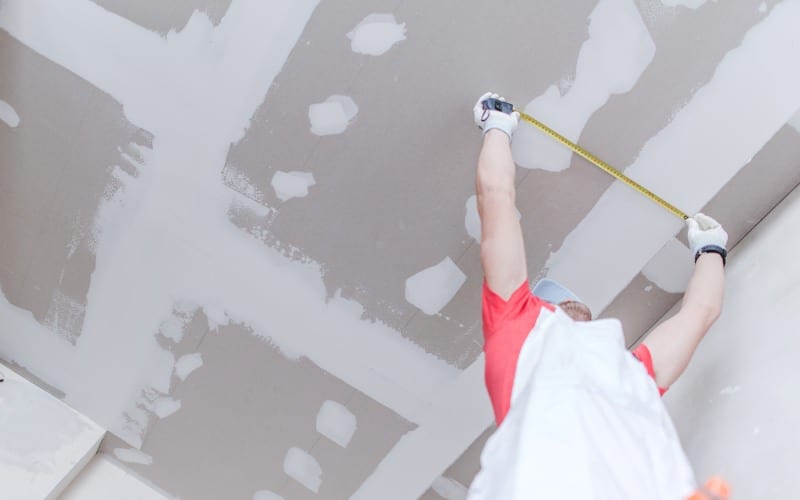
Getting the exact length of your corner is pivotal for a clean installation. First, use a measuring tape to determine the length from ceiling to floor or end to end for the horizontal corners. Ensure you measure twice for accuracy; an error at this stage could spell trouble later on. Now jot down these measurements, they’re your guide for how much corner bead you’ll need. Remember to deduct roughly ½ inch from the total length to allow for any subtle movements or shifts in the building structure after installation.
Next, pay attention to corners around windows or door frames. Here, each piece of corner bead will be shorter, but precision is still crucial. Measure the vertical sections from the ceiling to the top of the frame and the bottom of the frame to the floor. These careful measurements ensure your corner beads will fit seamlessly without unnecessary overlap that could mar the finished look.
Cut the Corner Bead to the Measured Length
Once you’ve got your measurements locked down, it’s time to cut your corner bead to match. For metal beads, metal snips are your go-to tool. With vinyl or paper-faced beads, heavy-duty scissors or a utility knife can do the job. Start with the introduction of an initial notch on one side, then replicate it on the opposite side. For metal beads, bending them gently at the notch will help break them cleanly along your cut line.
Work smart by keeping the bead a slight distance away from the floor – about ½ inch – to prevent issues later. When cutting, also ensure the ends don’t interfere with the opening and closing of doors and windows. Clean ends are vital.
For attaching metal beads, using a corner bead clincher can simplify the process, or alternatively, nails spaced at regular intervals—about 8 inches apart—will suffice. When employing a corner clincher, aim to crimp the bead every 4 to 6 inches along the corner, adapting to the specific requirements of your wall design. This ensures that whether your walls are exposed to high humidity or shifts over time, your corner bead stays anchored and intact.
Installing the Corner Bead
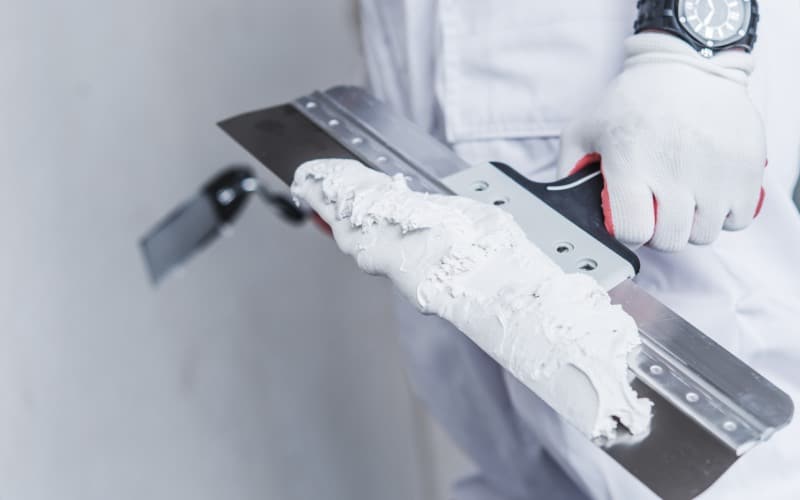
Apply a Thin Layer of Joint Compound to the Corner
To begin the installation, apply a thin, even layer of joint compound directly onto the corner. The compound should extend about 2 to 3 inches on each side of the corner. This layer acts as an adhesive for the corner bead, helping it to firmly attach to the wall. It’s critical that the compound is smooth to prevent any bumps or irregularities once the bead is in place.
Press the Corner Bead into the Joint Compound
With the layer of joint compound applied, it’s time to press the corner bead into place. Since your cut is a fraction shorter than the wall to accommodate movement, position the corner bead to start just shy of the floor, aligning it perfectly with the corner. This step requires attention to detail as you ensure that the bead is straight and level, which is vital for a professional-looking finish.
Secure the Corner Bead with Drywall Screws
After positioning the corner bead, you need to secure it. If you’re working with metal corner beads, use a corner bead clincher for a swift and effective attachment. For vinyl and paper-faced corner beads, drywall screws or nails are the go-to. Fasten the bead at intervals of roughly 8 to 12 inches, driving the fasteners until they are flush with the surface. It’s essential to keep the screws straight to avoid distorting the corner bead.
Fill Any Gaps or Holes with Joint Compound
Once the corner bead is fastened, inspect for gaps or holes. Any imperfections need to be filled with joint compound to ensure a smooth and even finish. When applying additional compound, feather the edges to blend into the wall seamlessly. This step might necessitate a few coats, with adequate drying time between, followed by a thorough sanding to achieve the professional finish you’re aiming for.
Finishing the Corner
Once you’ve installed your drywall corner bead, finishing it properly ensures a smooth, clean look that blends seamlessly with the rest of your wall.
Allow the Joint Compound to Dry Completely
Patience is key when working with joint compound. After you apply the initial layer, wait for it to dry completely before proceeding. Drying times vary based on the product used and the environmental conditions such as humidity and temperature. Manufacturers often recommend a drying time of 24 hours, but this may differ, so check the product instructions for accurate timing.
Sand the Corner to Smooth Out Any Rough Edges
Once the joint compound is thoroughly dry, it’s time to sand the corner. Using either sandpaper or a sanding sponge, carefully smooth out any excess compound to eliminate rough areas and imperfections. Sanding is vital for achieving a professional appearance. Be gentle yet thorough to avoid creating divots in the compound that would require further repair.
- Begin with a light hand to gauge the material’s response.
- Progress to medium grit if necessary, for more substantial unevenness.
Apply Additional Coats of Joint Compound if Necessary
For a pristine finish, you might find that additional coats of joint compound are required. This layering technique helps to ensure full coverage and a smooth surface. After applying each coat:
- Allow it to dry as per the manufacturer’s guidelines before sanding.
- Feather the edges to blend the compound seamlessly with the wall.
- Inspect the corner for uniformity after each coat.
Remember, when applying additional layers, it’s not about adding bulk but creating the flattest, smoothest corner possible. The ultimate goal is to ensure that the corner bead is entirely embedded within the joint compound without any visible edges or ridges.
Final Touches and Clean-up
Prime and Paint the Corner Bead
Once your drywall corner bead is securely installed and the joint compound is fully dry, priming is essential. Priming seals the paper and mud, creating an impermeable layer which prevents moisture from damaging the corner bead and compound. This step also ensures that paint adheres smoothly and consistently.
When you’re ready to paint, choose a high-quality paint to match or complement your wall colour. You’ll need to apply it generously over the corner bead to achieve a uniform finish. Remember to:
- Use a sandable primer if necessary, to smooth out any remaining imperfections
- Employ a paintbrush or a mini-roller for even coverage over the bead
- Inspect the corner carefully for brush strokes or uneven textures and correct them as you go
Clean Up Any Debris or Dust
Effective cleanup is crucial to maintaining a safe and tidy work environment. After the painting is complete, it’s time to turn your attention to the cleanup process. Proper disposal of any waste materials is not just about aesthetics; it’s a matter of safety and efficiency for future projects. Here’s what you need to do:
- Sweep or vacuum all dust and debris from the work area, especially that from sanding the joint compound
- Dispose of or recycle any scrap materials following local waste management regulations
- Rinse and clean your tools with water (for water-based products) to ensure their longevity and readiness for the next job
Flawless Finish
The key to a flawless finish is in the details—choosing the right bead, precise cutting, and careful positioning. For a professional edge, contact Honest Renovations. It’s our goal to meet your expectations, and then go beyond. Our team of highly skilled tradesmen specialize in residential and commercial projects.
Key Takeaways:
- Choose Wisely: Pick the right corner bead for your project.
- Prep Thoroughly: Ensure the corner is clean and smooth.
- Measure and Cut: Accurately size and cut the corner bead.
- Apply Joint Compound: Use the joint compound to adhere to the corner bead.
- Secure Firmly: Attach the corner bead securely with screws or nails.
- Smooth Out: Use a taping knife to smooth excess compound.
- Let Dry Completely: Allow the joint compound to dry fully.
- Sand Smooth: Sand the corner bead for a seamless finish.
- Prime and Paint: Prime and paint for a professional look.
- Inspect and Touch Up: Check for imperfections and touch up as needed.
Commonly Asked Questions
What is a drywall corner bead, and why is it necessary?
Drywall corner bead is a metal or plastic strip used to reinforce and protect the corners of drywall. It provides a straight edge for finishing and prevents damage to corners from everyday wear and tear.
What tools and materials are needed to install drywall corner bead?
Common tools and materials include a utility knife, drywall saw, tape measure, corner bead, joint compound, trowel, and sandpaper. Additional items like a corner bead crimper may also be required.
What are the steps to install drywall corner bead?
The typical steps involve measuring and cutting the corner bead to size, applying joint compound to the corner, pressing the corner bead into place, securing it with nails or screws, and finishing with additional layers of joint compound.


Leave a Reply
Want to join the discussion?Feel free to contribute!