Step-by-Step Guide: How to Perfectly Install Drywall in Your Basement
So, you’re looking to finish your basement and maximize your home’s square footage? It’s not as simple as slapping on some paint and calling it a day. One of the final, but crucial steps in this process is putting up the drywall. This isn’t a task you can rush into, as drywall needs a proper surface to adhere to.
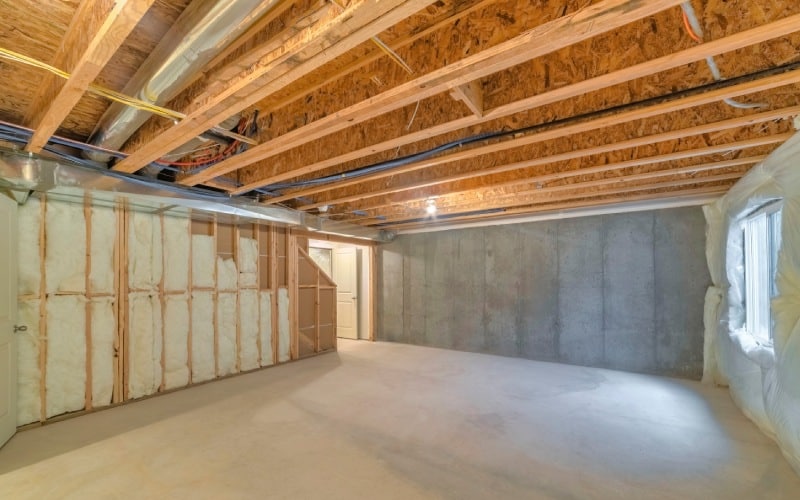
Basements are notorious for collecting moisture, especially around concrete walls or cinder blocks. You’ll need to ensure a gap between the wall and your drywall by installing studs first. But even after the studs are up, you’re not quite ready to hoist that drywall. There are a few more things you need to consider.
Planning the Drywall Installation in the Basement
When embarking on a basement renovation, good planning is key to a successful project. This involves preparing for the unique environmental factors of your underground space – paying careful attention to moisture levels, potential mould growth, and characterizing the overall structure. Your plan should also include precise measurement and materials estimation.
Measuring the Area
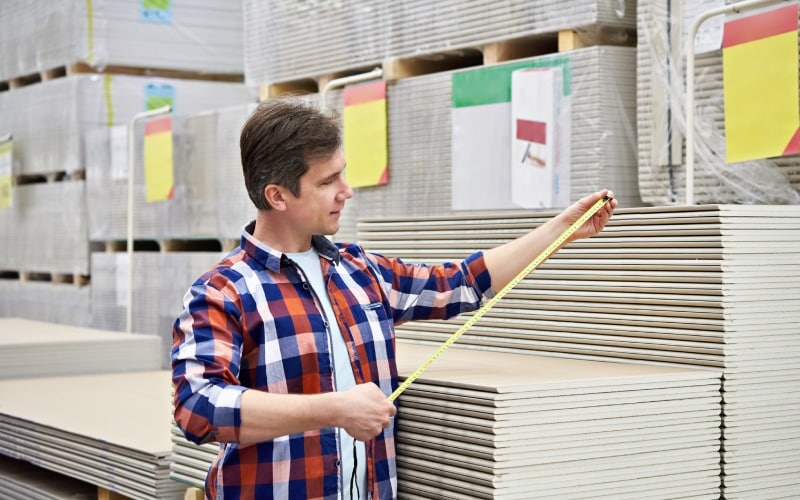
As with all renovation tasks, accurate measurement forms the backbone of your plan. Drywall installation requires thorough detailing for a snug and polished finish. Use your tape measure to determine the dimensions of your walls and ceiling, factoring in any irregularities in contour or design.
Remember to identify and mark the locations of your electrical box installations on your drywall sheets. Carefully trace their silhouette to ensure that your outlets align perfectly once the drywall is in place. This step is crucial in achieving an optimal blend of aesthetics and utility.
Estimating Material Needs
Part of the planning process is correctly estimating the materials you’ll need, including drywall sheets, nails, adhesive, and painting supplies. Depending on your personal preference, you might want to consider fire-resistant drywall for spaces near fireplaces or other heat sources. Drywall comes in varying thicknesses, with thinner drywall being a lighter and perhaps more manageable option for do-it-yourself installations.
Before installing any drywall, check for potential humidity issues. Humidity not only affects the installation process, but can also lead to mould growth and compromised wall integrity in the long run. Accordingly, professionals often recommend installing 1/4 furring strips and 1/2-inch foam insulation board for added protection against moisture.
Factor in waterproofing measures, particularly for limestone and other porous materials. Coating your wall with a waterproofing masonry paint is a wise move, providing an added, customizable layer of protection against potential moisture issues.
Preparing the Basement for Drywall Installation
Transforming your basement into a delightful living space commences with comprehensive preparation. This preparatory stage is vital, albeit frequently neglected.
Clearing the Space
The first step towards creating your dream basement is making room for the transformation. Clear the area methodically, emphasizing a safe and clutter-free workspace. Creating a clean, unobstructed area ensures a smoother installation process. You might have to handle additional tasks such as adjusting furniture and equipment, so it’s best to be prepared!
Checking for Moisture and Dampness
When remodeling your basement, you may come across exposed masonry walls. But, before you can cover these with drywall, you need to manage potential moisture issues. White efflorescence is an indication of prior moisture encounters. You can eliminate this chalky residue using a stiff brush and a mild detergent. Once you’ve gotten rid of the efflorescence, apply a waterproofing masonry paint to prevent possible future moisture invasion.
Don’t forget the essential role of a vapour barrier in your basement renovation. This nifty transparent sheet acts as a moisture safeguard, snugly positioned between the framework and drywall. The vapour barrier functions to keep dampness at bay, so averting potential water damage predicaments commonly associated with subgrade spaces.
Installing the Drywall in the Basement
Finishing the basement with drywall means taking on the critical task of turning the bare framework of your underground space into aesthetically pleasing walls that not only enhances comfort but also elevates the value of your home. This section offers constructive guidance on the steps you need to follow when installing drywall in the basement.
Cutting and Fitting Drywall Sheets
Before you kick start the process of drywall installation, you need to pinpoint the unique characteristics of your basement. Essentially, this involves measuring every wall and ceiling area including any irregular features with precise accuracy. Afterward, you’ll transfer these dimensions to your drywall sheets and skillfully slice through with a sharp drywall knife. Making precise cuts are integral to achieving a seamless finish and preventing gaps in the finished walls.
During this phase, you’ll take into account the exact positions for electrical outlets which are essential for the functional utility of your space when drywall is secured. This ensures that outlets will align flawlessly once the drywall is secured, making sure your space remains functional without compromising on its polished appearance.
Securing Drywall to the Walls
Hanging drywall is less a task and more an art that has a direct influence on the quality of your basement renovation. To begin hanging the drywall, position your first panel at the corner of a wall, making it perfectly perpendicular to the framing. Now you’ll seal the panel with screws that are drilled into the studs directly. One thing to note is you should maintain a gap of about 1/2 inch from the floor to prevent moisture wicking. This is a useful technique that helps form the smooth underpinning of your area’s transformation.
It is also worth mentioning that basement walls, especially those made from cinder blocks or concrete, tend to collect moisture. To accommodate for this, ensure there is a gap between the drywall and the wall by installing studs first. So, the studs create a physical barrier that prevents dampness from reaching the drywall.
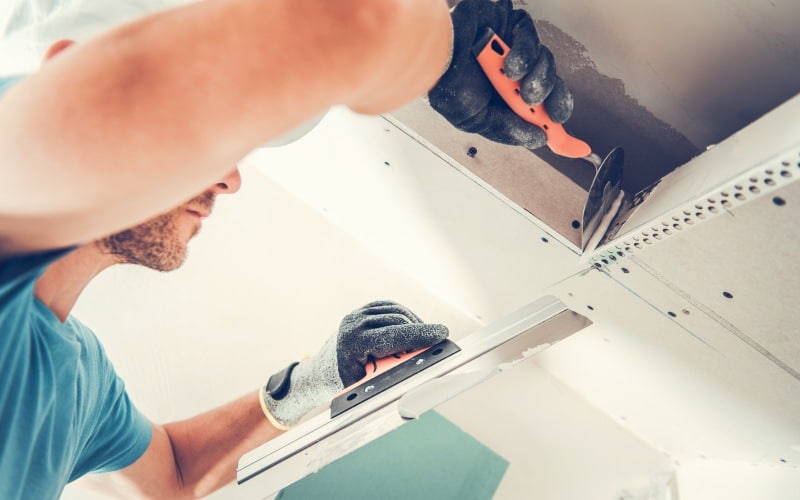
Taping and Finishing the Seams
The final stage of installing drywall in your basement concerns sealing the joints where different drywall sheets meet. The seams are taped and then filled with a compound, often referred to as ‘mud’. Applying plaster to these joints requires quality materials, endurance, and an eye for detail because the aim here is a flawless, seamless result.
Grasping the nuances involved in the aforementioned steps not only ensures the longevity of your drywall installations but also maximizes the potential utility of your basement renovation. So your basement is not only going to look good, it’s going to last you a good long while as well.
Make the Most of Your Basement
From the meticulous measuring and cutting of drywall sheets to the careful positioning of electrical outlets, you have the foundational knowledge needed for a basement transformation. Hanging drywall involves more than simply affixing it to the wall; it requires proper sealing with screws, a slight elevation from the floor to prevent moisture problems, and the essential task of taping and finishing seams for a flawless look. However, if the project feels overwhelming or if you’re seeking that professional touch, Honest Renovations is here to help. Our team can expertly finish your basement, ensuring a high-quality result that meets your vision. With Honest Renovations, your basement’s transformation is not just a dream but a tangible reality, achieved with professionalism and care.


Leave a Reply
Want to join the discussion?Feel free to contribute!