Optimizing Drywall Installation: Vertical or Horizontal – Which Way to Go?
Ever wondered why drywall installation often goes horizontal? Or perhaps you’ve pondered over the advantages of a vertical approach? Well, you’re not alone. The orientation of drywall installation is a topic that’s sparked many a debate among DIY enthusiasts and professionals alike.
The truth is, both methods have their merits. Horizontal installation, for instance, results in fewer seams and joints – about 25% less compared to vertical. It also helps hide minor framing irregularities better. But vertical installation has its perks too, especially when it comes to walls matching standard drywall sizes.
Understanding Drywall Installation
The Basics of Drywall
Drywall, also known as sheetrock, wallboard or plasterboard, plays a vital role in interior construction. It refers to panels used to create walls and ceilings inside buildings, providing a smooth base for decoration. A standard drywall panel, composed of gypsum sandwiched between thick sheets of facer and backer paper, comes in specific sizes: 4 feet wide and lengths of 8, 10, 12, or even 16 feet. The thickness varies, with 1/2 and 5/8 inches being common for walls and ceilings respectively. Considering these aspects, it’s clear that one size doesn’t fit all, and the same applies to drywall installation orientation.
Vertical and Horizontal Installation Methods
The debate often comes down to whether drywall should be installed vertically or horizontally. As you’ll find out, it’s not always a simple choice and depends on a variety of factors.
1. Horizontal Method
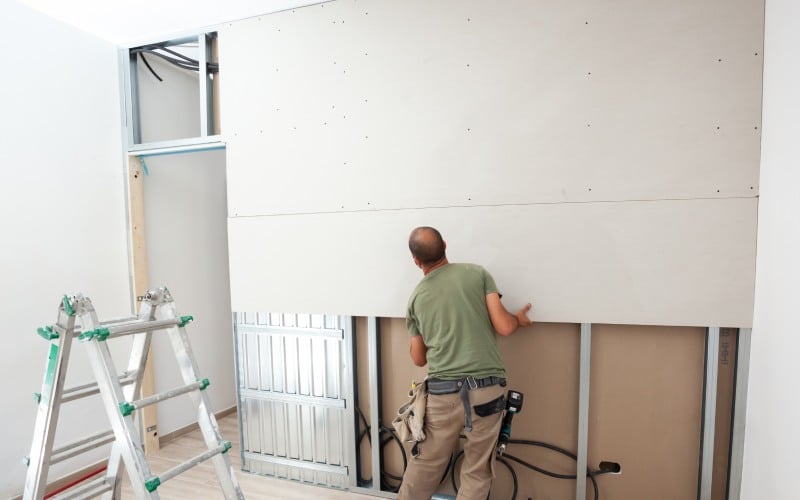
One might assume, given drywall panels’ rectangular shape, that they’d naturally get installed in a horizontal orientation. A well-known advantage of the horizontal method includes fewer seams and joints, about 25% fewer when compared to the vertical method. This results in less taping and mudding work. Additional benefits include the concealment of minor framing irregularities, easier creation of smooth seams, and increased wall assembly rigidity.
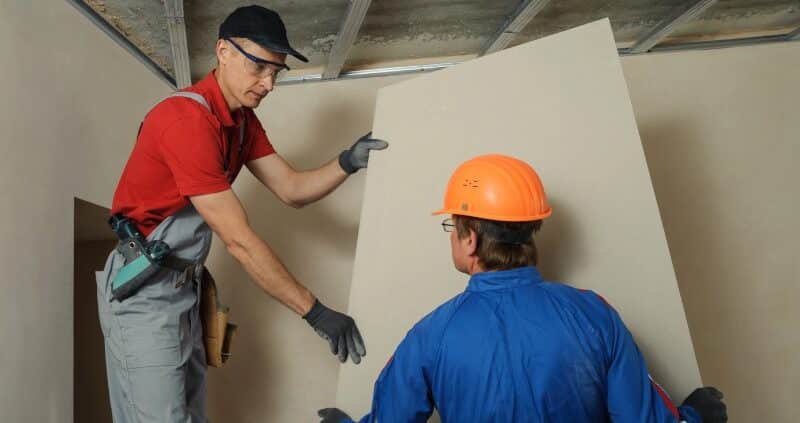
But, this orientation might require additional hands due to the necessity of lifting full sheets overhead.
2. Vertical Method
Alternatively, the vertical method is appealing when the wall height closely matches standard drywall sizes. In this case, you can eliminate horizontal butt joints, with all joints transitioned from tapered edge to tapered edge. Hanging vertically ensures that each seam falls on a stud, providing solid support. Besides, this method might be easier for a single installer since it reduces the need to lift and hold up full sheets.
Whether you hang vertically or horizontally, it’s crucial to avoid placing any seams directly in line with the corners of doors or windows, as these areas are prone to cracking. Remember, the best practice is to use the longest sheets possible to minimize the total number of joints and to adhere to specific building codes that may require either orientation.
Pros and Cons of Horizontal Drywall Installation
Advantages of Horizontal Installation
By selecting the horizontal method, you stand to benefit from several notable advantages.
- Minimizing Seams: As you install drywall horizontally, remember you are working with long sheets of drywall. It’s quite simple, longer sheets mean fewer seams. An approximate 25% reduction in seams compared to vertical installation can be expected. As a result, benefits not only include less taping and mudding work but also a smoother overall appearance.
- Convenient Seam Placement: You’ll also find seam placement considerably easier for these horizontal installations. These seams would be around the 4-feet mark, making them easily accessible, requiring less stretching and bending to smooth them out, saving your back some unnecessary strain.
- Accommodating Minor Framework Faults: An additional bonus of this type of installation is its superior ability to cover minor framing irregularities. Bowed studs, bumps, or waves that are common in some building projects can be bridged over using horizontal drywall, ensuring a smoother finish overall.
Disadvantages of Horizontal Installation
While the benefits of horizontal installations are substantial, there are a few important drawbacks to consider.
- Unstable Seams: The horizontal installation might leave some seams unsupported since they may fall between studs. But, with the right installation techniques, this issue is often not significant.
- Tricky Installation Process: Installation of the horizontal sheets can be more physically demanding. Lifting full sheets overhead, even with the assistance of a drywall lift, can be a bit tougher, especially if you’re working solo.
- Challenging Baseboard Installation: Installing baseboards can be a bit more difficult with horizontal drywall installation. The reason being, there is no tapered edge along the bottom of the wall where the baseboard would be placed.
Pros and Cons of Vertical Drywall Installation
Advantages of Vertical Installation
Vertical drywall installation offers a range of benefits.
- Reduced Seams: As the sheets run from floor to ceiling, vertical installation allows for limited seams. This results in less taping and mudding work, saving both time and effort.
- Emphasis on Height: It helps emphasize the height of a room, particularly beneficial in spaces with high ceilings, as it creates a visually elongated and open feel.
- Less Cutting: In certain instances, vertical drywall installation results in fewer cuts and waste. Especially when working with standard 8-foot or 12-foot sheets, vertical installation often requires less trimming around doors and windows.
- Structural Strength: By running the long seams perpendicular to the wall studs, vertical drywall installation adds structural strength to the wall. The studs provide additional support and stability.
- Easier Handling: Handling and lifting vertical sheets may be more manageable in certain situations.
Disadvantages of Vertical Installation
Even though its many benefits, vertical drywall installation isn’t without its mishaps.
- Seam Treatment: Unlike horizontal installation, where the seams must be mudded to provide resistance against fire, smoke, and air travel, vertical installation doesn’t require its seams carry the same mandate.
- Structural Complications: Problems can arise if the wall’s height exceeds the length of the drywall sheet. In such cases, a horizontal seam becomes necessary—an aspect that potentially weakens the wall’s structure and interferes with the aesthetic appeal due to added seams.
- Unsupported Vertical Seams: Vertical seams always fall on a stud for solid support but if installed inadequately, the unsupported areas can pose a problem.
- Single-Installer Difficulty: Handling and lifting full sheets of drywall single-handedly may be more challenging vertically than horizontally.
Expert Tips for Success in Drywall Installation
Before starting your drywall installation, it’s crucial to prepare thoroughly by ensuring a clean, secure, and well-structured frame. Carefully checking each stud for any irregularities like twists, bows, or warps will facilitate a smoother installation process. While drywall sheets can bridge minor framing irregularities, minimizing these is beneficial for easier installation. Remember to maintain a 1/8″ gap between the drywall sheets and the floor to prevent moisture wicking. Additionally, using the longest sheets possible can reduce the number of joints, simplifying the process. Consider the height of your walls and choose a vertical installation for standard sizes to avoid horizontal butt joints. For professional drywall services, consider Honest Renovations, which offers expert assistance to ensure your project’s success with optimal results and efficiency.


Leave a Reply
Want to join the discussion?Feel free to contribute!